I was in Fabric Place Basement recently and some lovely sparkly herringbone caught my eye on the wool remnant table. I immediately thought jacket, and luckily it was 60″ wide and just over 2.75 yards. At the checkout, they rang it up and the entire cut was SIX DOLLARS.
I initially thought I’d make a Sapporo Coat by Papercut, but after looking at a ton of photos on Instagram I changed my mind. I do like the shape of the Sapporo, but the wool is a bit thin and didn’t seem like it would give me the structure I’d want.
Luckily Helen’s Closet released the Pona Jacket that same day! I liked the collar and lapels, and how it looks like an oversized blazer, plus she lists light to medium weights for appropriate fabrics. SOLD. The fabric requirements listed are 3.3 yards, but I’ve found Helen’s patterns to overestimate the requirements a bit, plus I tend to cut everything out flat to maximize fabric, so I was sure I could make it work.
I put in an order at PDF Plotting and started planning some details. Since the jacket is oversized and my fabric cost $6, I decided to skip a muslin.

I made a bunch of modifications to the pattern.
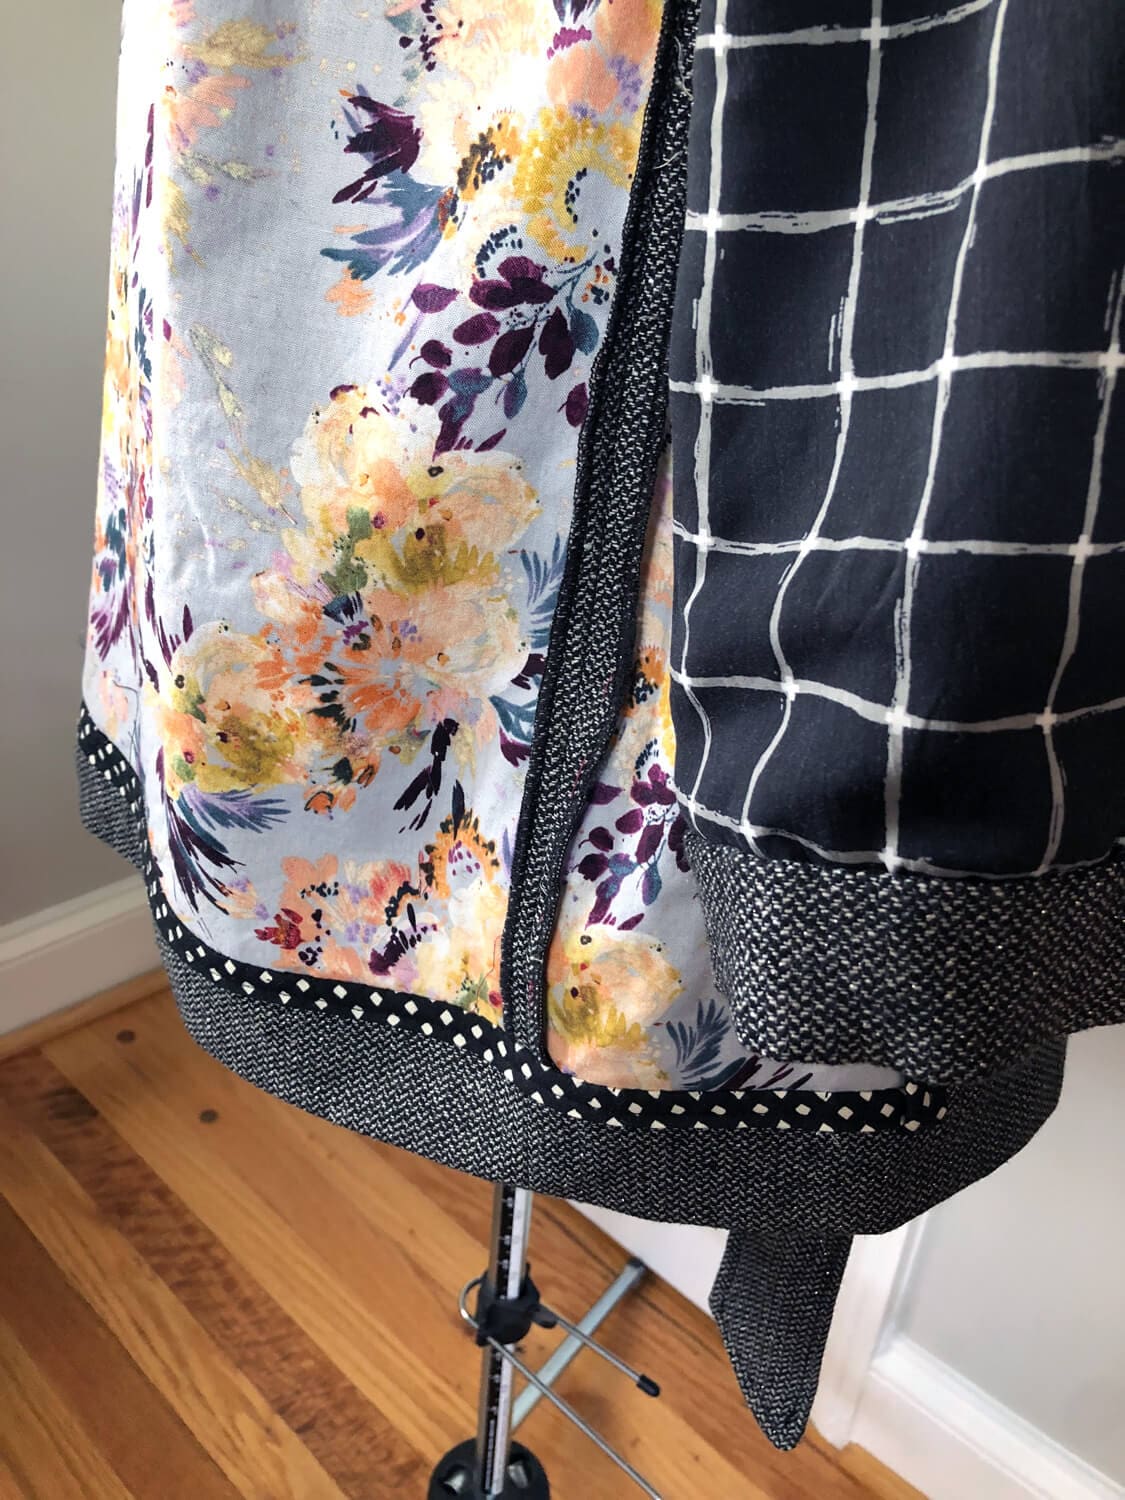
Underlining! I’ve never used this technique before, but after reading Brooks Ann’s series on it I’ve been itching to try. I wanted to add some structure and a little more warmth to the thin wool. I used this beautiful quilting cotton I picked up at Stitch to underline the front and back pieces, but not the facings. I had a big enough rayon scrap to underline the sleeves, but since it was so light I also added a layer of thin muslin. The rayon makes it easier to slip this on and off, plus when I cuff the sleeves there’s a little peek of the plaid! I hand basted the pieces together and loved every second of it.

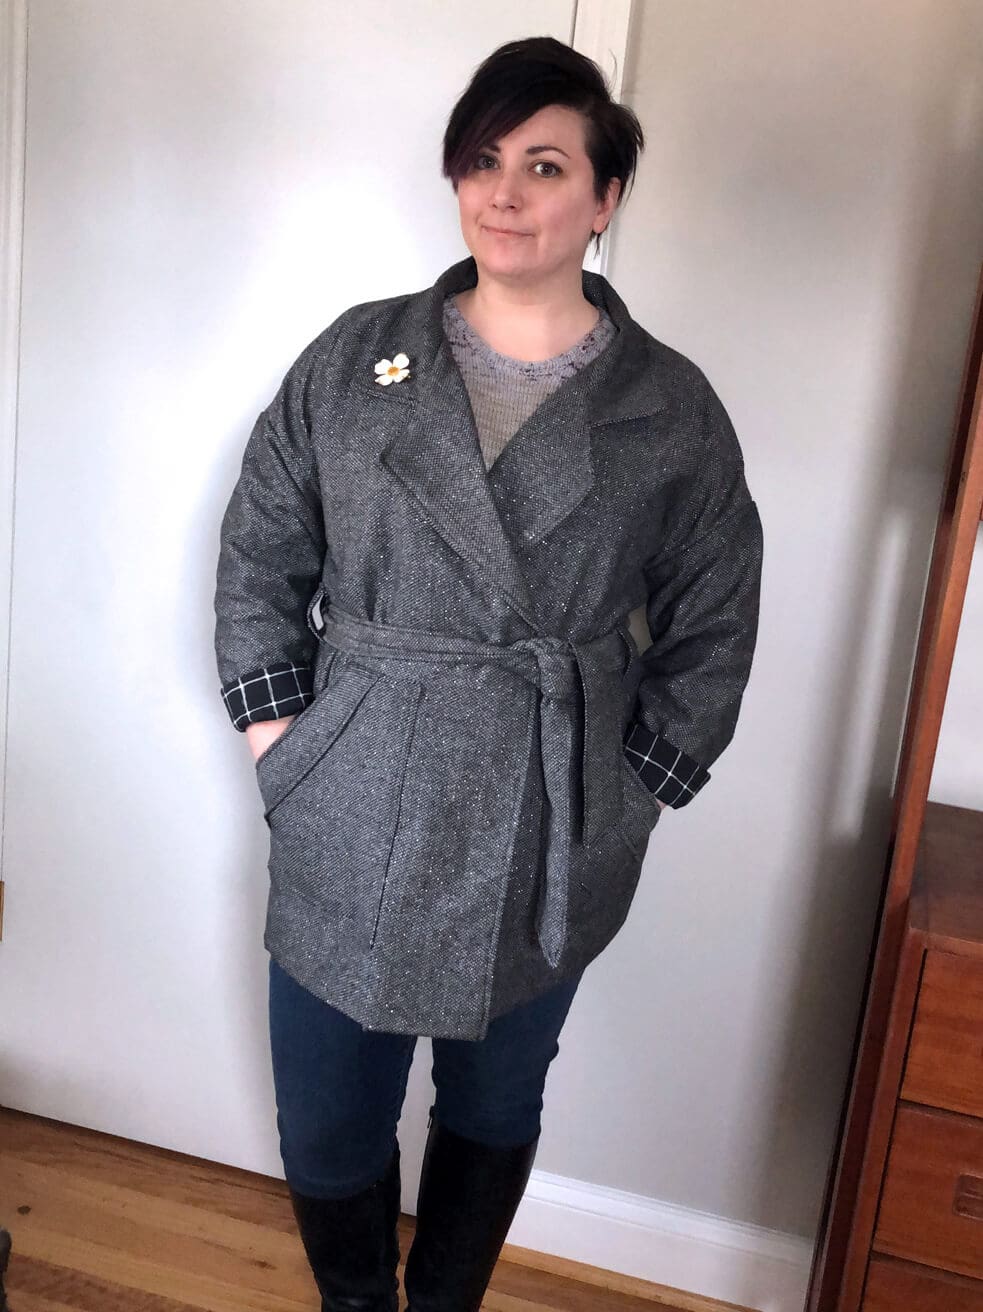
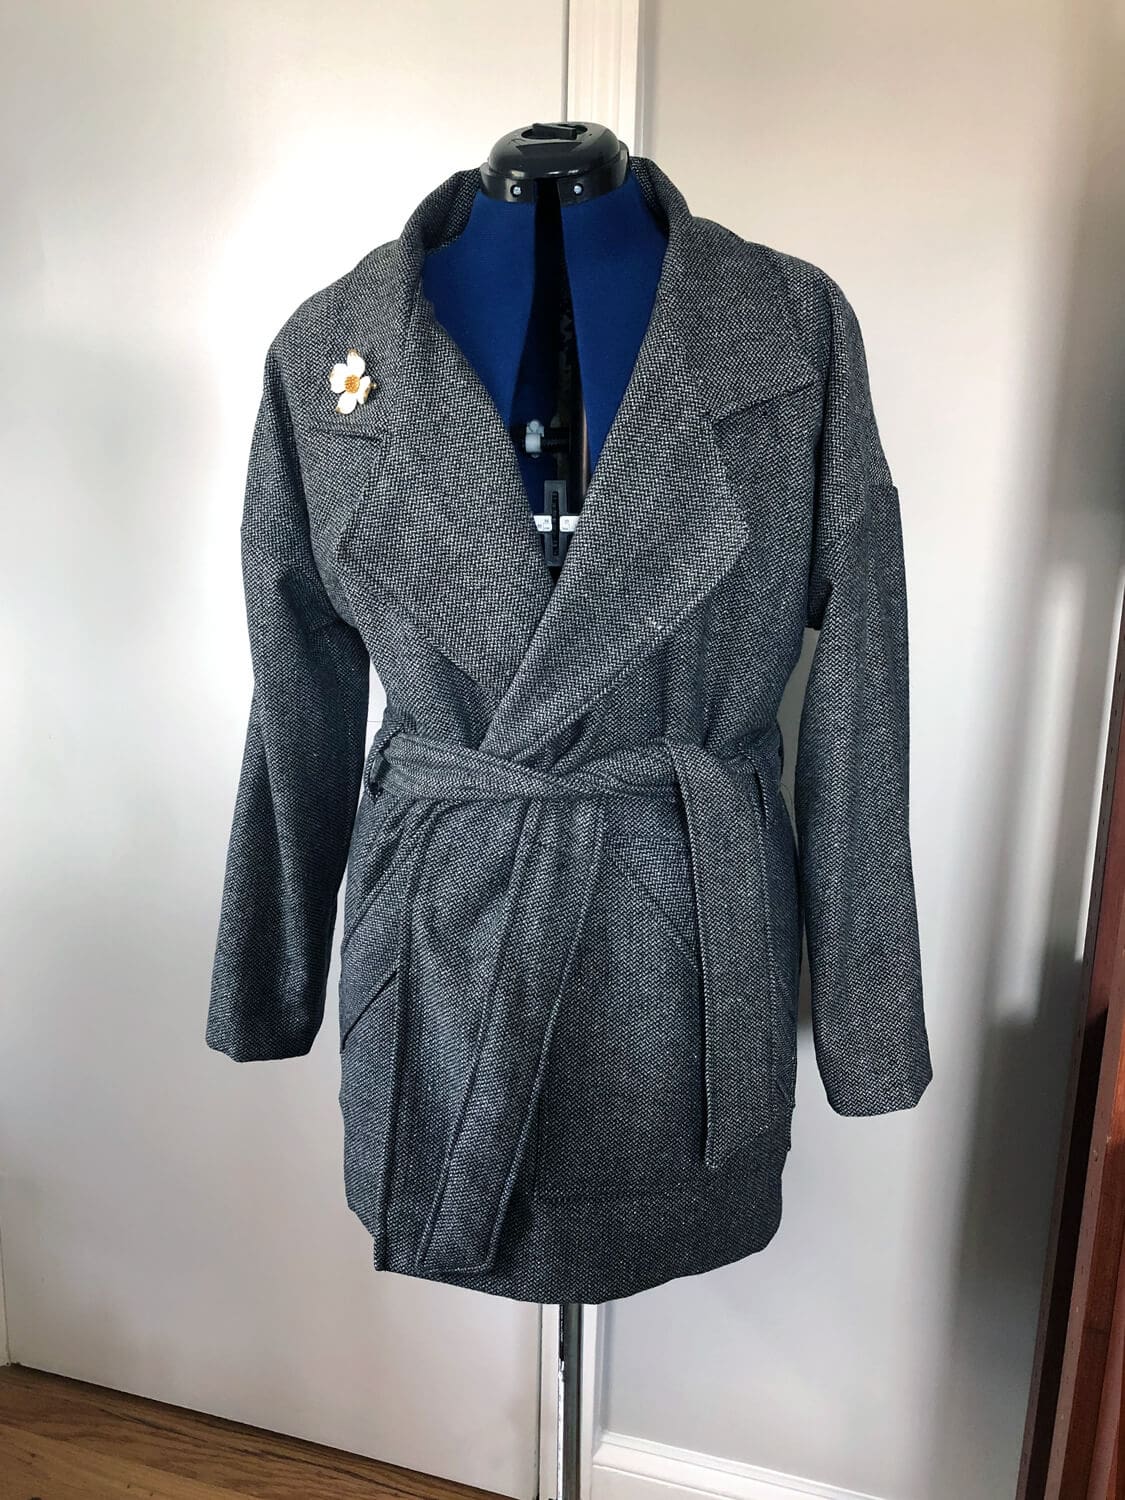
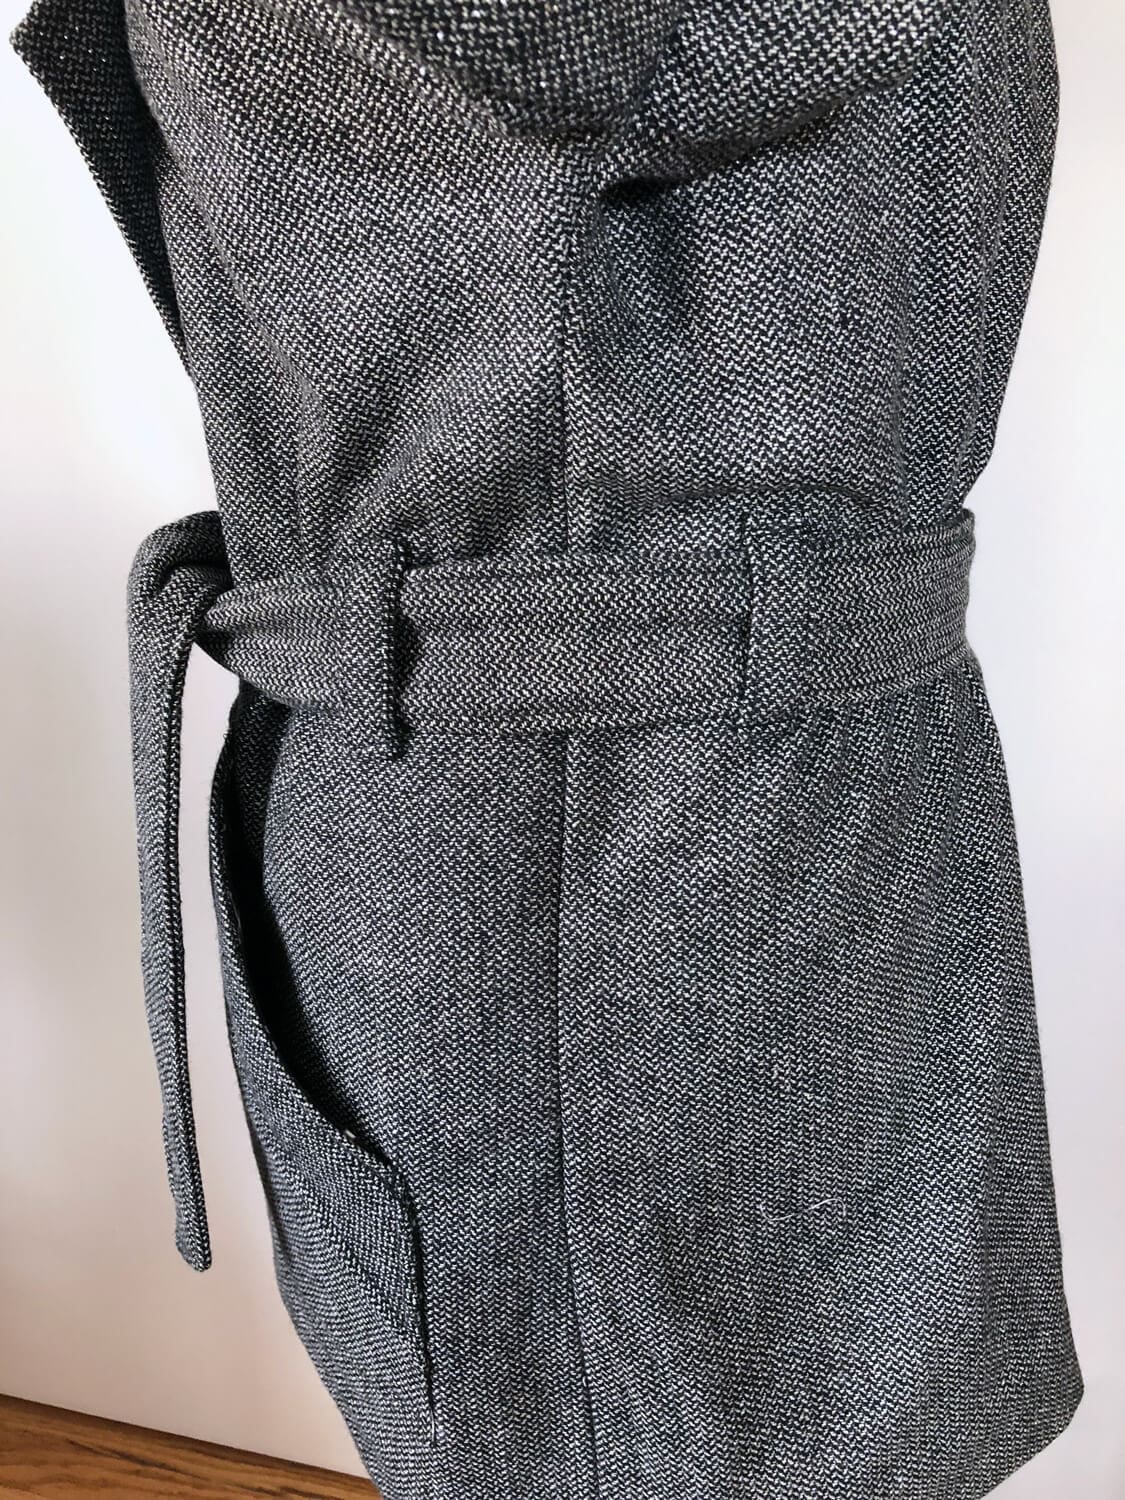
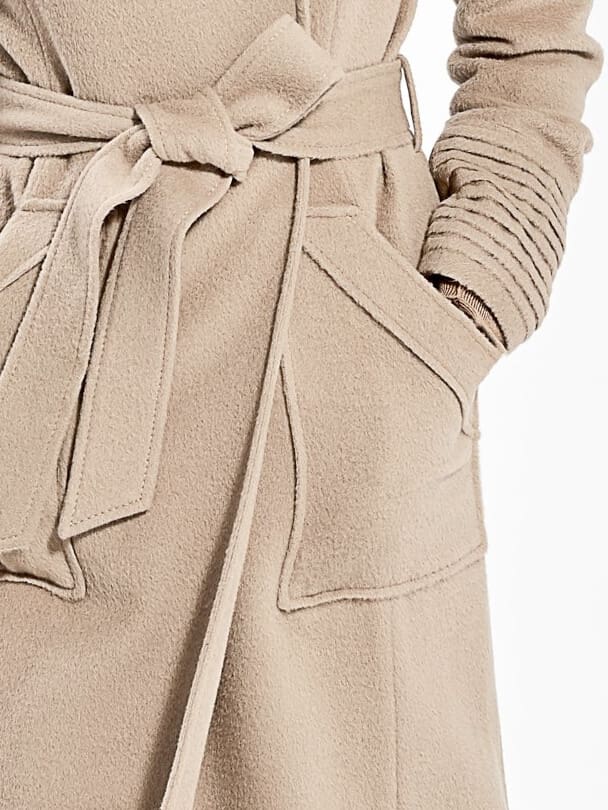
Belt! I decided I wanted to be able to close the jacket. This meant picking a size that would have enough ease that I could overlap the fronts to accommodate that. I went with a 16. I decided on a belt and 4 belt loops for the closure. I keep going back and forth about adding a button or two also, but for now I’ll just stick with the belt.
Since the jacket is so oversized, Helen recommends going by your high bust measurement and not grading between sizes, but since I knew I was adding a closure and no slit at the back, I wanted plenty of room in the hips so I graded up a size there.
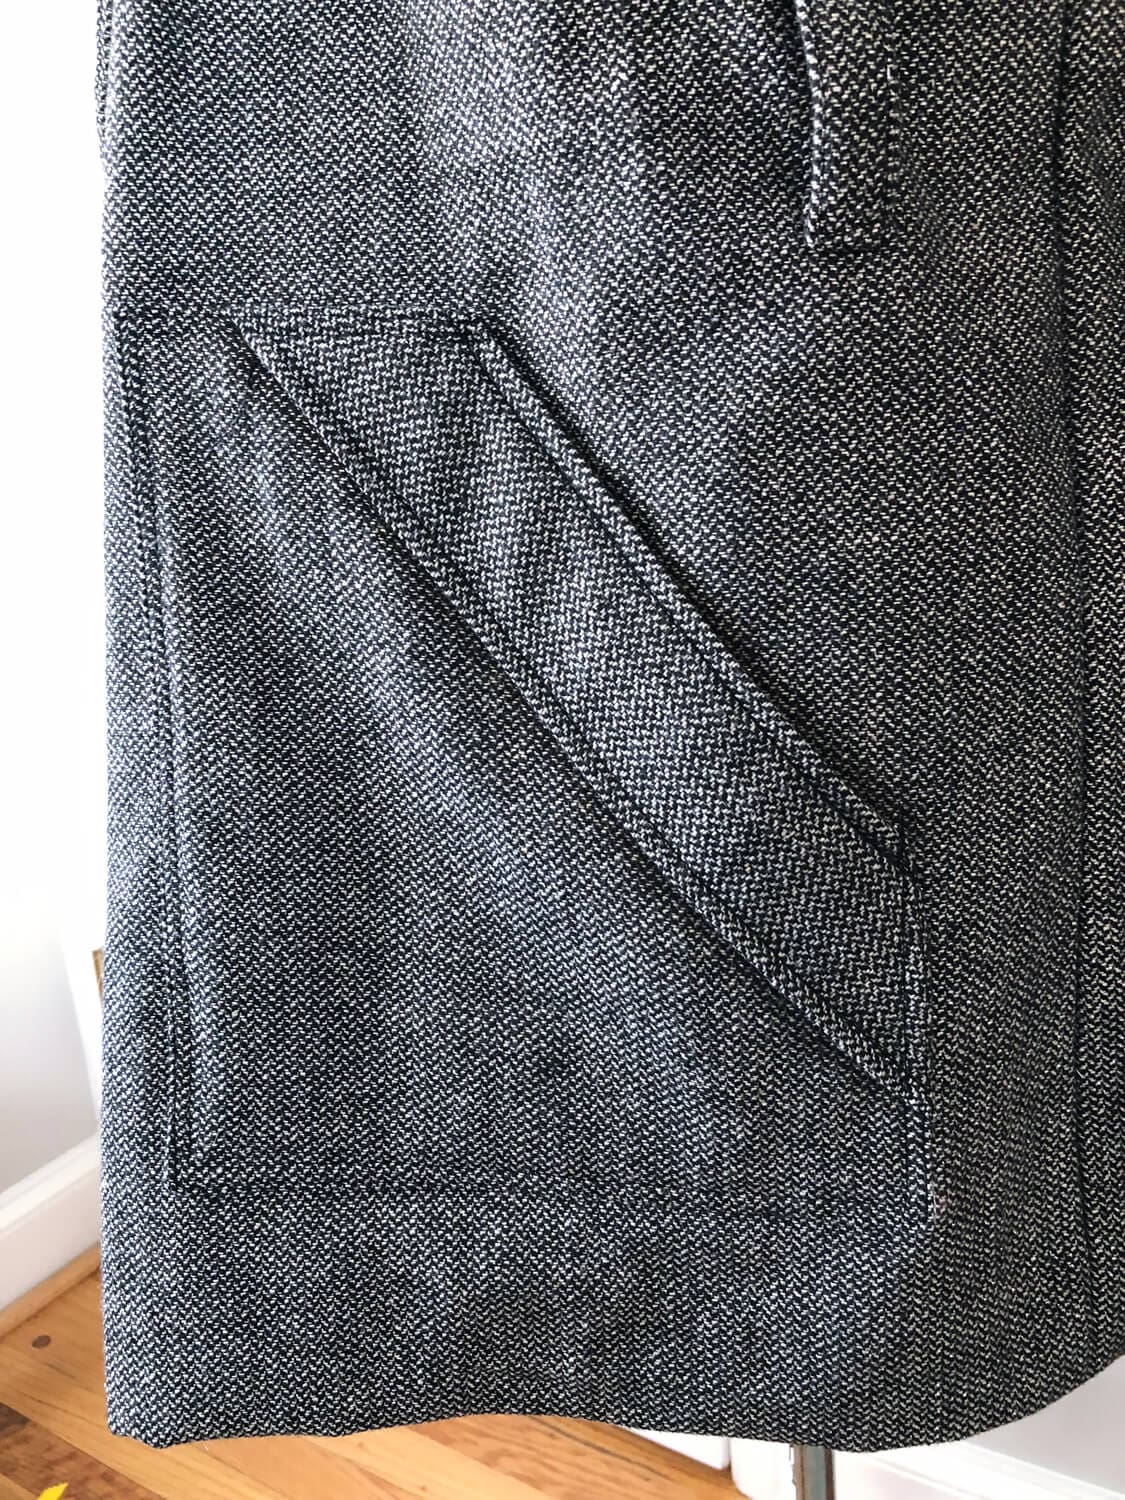
Pockets! I changed the pockets to be angled patch pockets. I copied this off a photo of a RTW coat I found. I considered switching them from patch pockets to in-seam or welt pockets, but am really happy with how these came out. The angled pocket feels a bit more secure and it’s really comfortable to slip my hands in and out. I also made them a bit taller than the pattern piece and lined them with rayon.
I used a couple of seam finishes: Bias binding on the facing and hem; serged edges on the shoulders and side seams pressed open; hand-stitching the cuffs and hem to the underlining (the best part of underlining!!).
The seam where the sleeve meets the body is a little bulky with all those layers, so I really pressed the hell out of it.
As usual Helen’s instructions were great, and this is a really quick project. Not counting the extra steps I added (the pocket modification, underlining, and belt), I sewed it up in an afternoon.
I’m pretty happy with this one! I don’t normally wear oversized garments, but I feel like outerwear is a safe bet to step out of my comfort zone, plus the belt helps. I’m sad I can’t seem to capture the sparkle of the fabric in a photo, but trust it is amazing.


This jacket is so comfortable and feels fairly warm. I have a pretty high tolerance for cold, so with a big scarf, I think this will get me through most of the winter unless it’s really super freezing. For those days, I have another coat planned in my head, involving thinsulate! No idea if I’ll get to it this winter though.
